* = optional/if necessary
~~~~~~~~~~~~~~~~~~~~~~~~~~~~~~~~~~~~~~~~~~~~~~~~~~~~~~~~~~~
1. Get all your material!!!!
- fake snow (dollar store)
- coarse glitter (Michael's)
- fine glitter (Michael's)
- glue gun
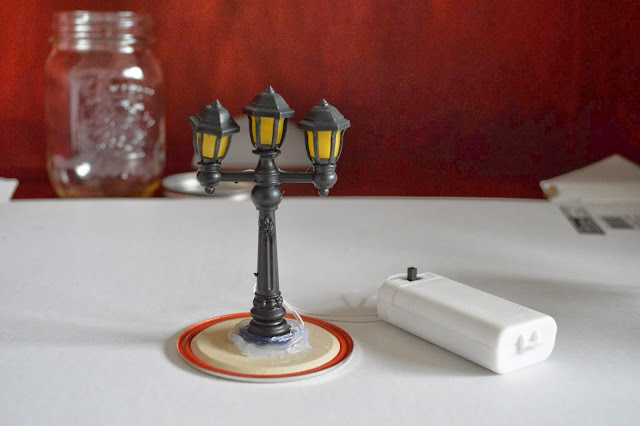
- light up Christmas mini lamp (Dollarama//you're lucky if they have any left//batteries maybe)
- mason jar (Home Hardware or Save-On Foods).
*2. Put in the batteries to see if the lamp works because some of them are really cheap and don't work.
*3. I'm not a big fan of the wreath because I like it to be more winter themed than Christmas. So when I took off the wreath there was a bit of white glue left, so you can just cover that up with black nail polish.
4. You're gonna get the mason jar and unscrew everything and get the lamp.
5. Place the lamp in the middle of the flat part of the lid that comes off (no sh*t, me. wow.) and mark where it has to be if you want to.
6. Get the glue gun all warmed up and test it a bit.
7. Put glue around the base of the lamp. Don't put it under the base and then stick the lamp on top of it because then you can make it uneven and too high for fitting in the jar.
8. Now get the fake snow and pour it into the other unused mason jar. I keep my fake snow in another mason jar because I mix a bit of glitter with it before and it looks nicer/takes up less space than a stupid plastic bag.
Fill it up 'till about here:
9. Put the glitter in the jar and shake the jar (closed obviously) to really get a good mix. I don't think that you can ever put too much glitter in these because more glitter = cooler effect.
10. PUT THE GLUED LAMP BOTTOM PART UPSIDE DOWN INTO THE JAR AND THEN SCREW IT ON.
And roll it around…
And stare at it…
And turn it on…
Now turn off the lights…
Now feel proud!
YAY!!!!! YOU DID SOMETHING!!!!!


No comments:
Post a Comment